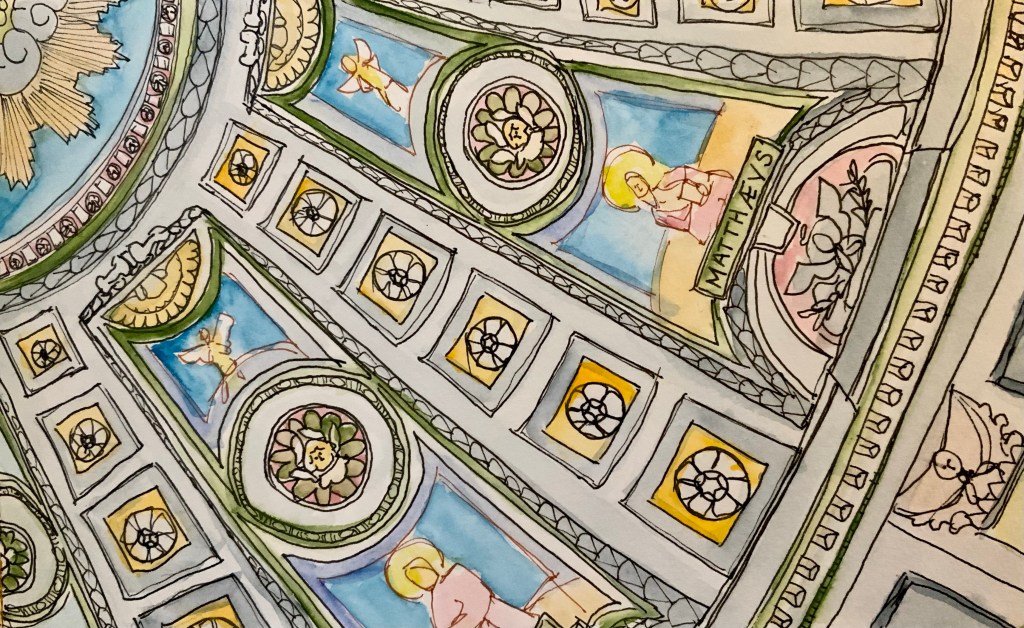
I was asked to share some insights into beginning to urban sketch. First off, the purpose of the urban sketching experience is not to create a masterpiece. It is to take time to study a subject and remember the moments you sat communicating and capturing that experience onto paper. It is about memory making.
Basic techniques
- Use pencil to block in, not to draw every detail
- Use the end of the pencil or a pen cap to measure height vs width and make sure you don’t run out of paper/ can fit everything on your page
- Go with the flow of your pen – if it’s not exactly straight just work it into what you are doing
- Draw what you see, not what you think you should see – SIMPLIFY IF NEEDED
- Put thick lines in the front or foreground, and thin lines in the background
- Keep the most detail in front and simplify what is in the background
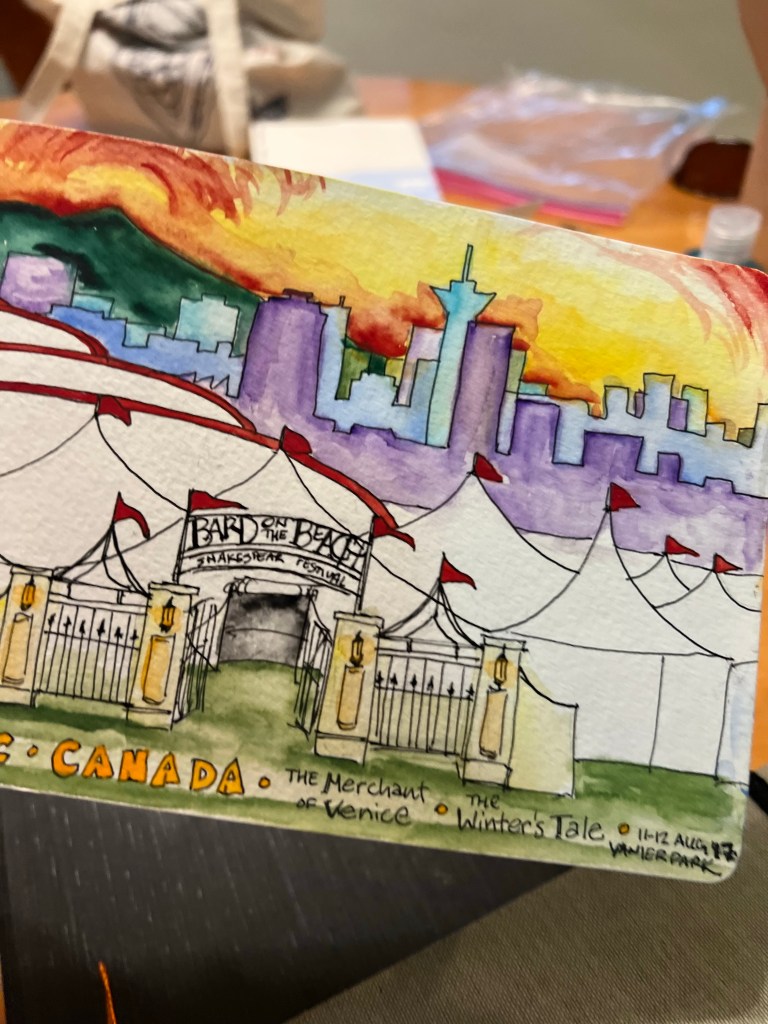
- If trying to creat a sense of depth – keep color up front and light washes in the back
- In watercolor usually you work in layers from light to dark
- Fill in extra space with words and lettering
- When painting trees, add some yellow for the light coming through the branches
- When painting water, add some shadow near the shore in purple or even darker. Shadows on the water from the shores and boats are quite dark.

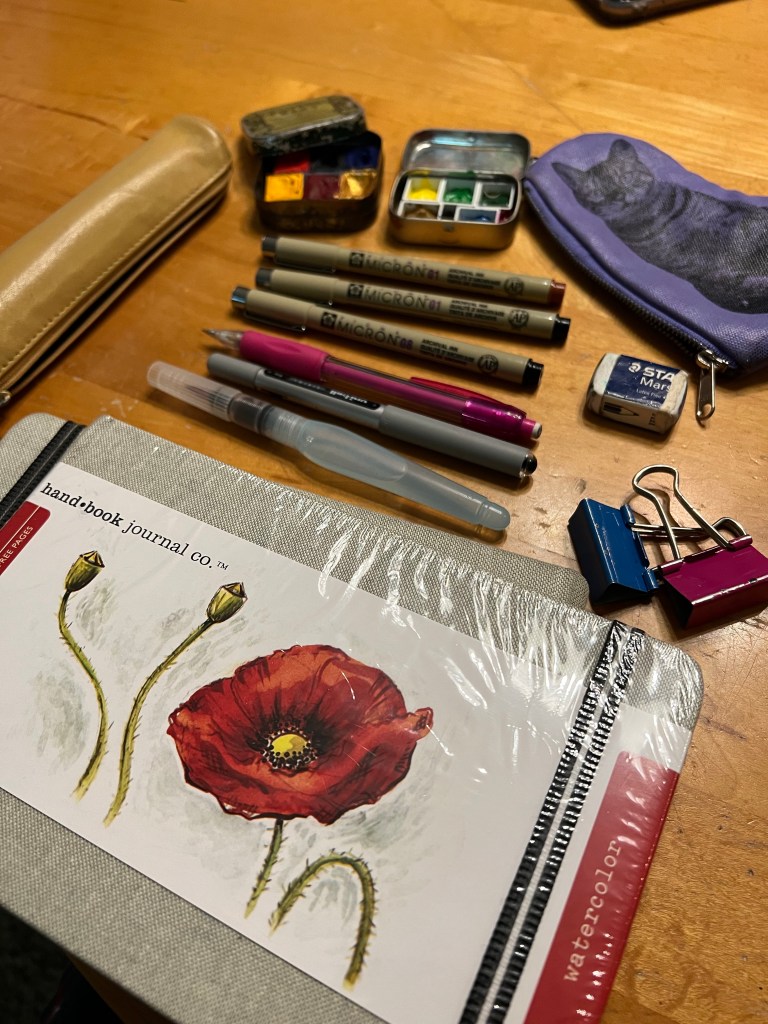
Supplies
Some supplies are really straight forward like a mechanical pencil, and others are more nuanced and varied, like what pens to use. First off, this commentary is for urban sketching done with ink and watercolor. You can use lots of art materials to urban sketch, but this commentary will focus on ink and watercolor.
- Uni-Ball Vision fine WATERPROOF black pen (it comes in non-waterproof too, so double check the label)
- Micron felt pens – Large 08, and Super fine 01 size (black and brown)
- Mechanical pencil
- Pentel water brush (so you don’t have to carry around a cup of water to do watercolors)
- Staedtler brand Mar’s Plastic eraser
- Binder clips (to hold your pages down if its windy)
- Sketchbook – I use Hand Book Journal Co, and specifically the watercolor large landscape book (#769525)
- Watercolors! I’ve made my own out of a small Altoid tin using some plastic watercolor “pans” bought at the art store, then squeezing in the paints I want.
- Watercolor brands – Get nice expensive paints. I like to use L’Aquarelle paints by Sennelier, which use a honey-wax base. I also have some Japanese paints by Holbein (sometimes seen as HWC – Holbein Artists’ Watercolor), and I really love my hand-made Redwood Willow watercolors, which are currently not available : ( I will talk about colors in a moment.
- Pouches to hold supplies together (I use two)
Colors
What colors you put into a traveling kit depends a lot on what you like to use and paint. I go for bold colors. Make sure to have basic colors that you can mix to make other colors. So, primary colors of red, blue, and yellow are recommended. I usually have about six colors per tin. My colors are:
- Crimson Red
- Bristol Yellow
- Cadmium Yellow
- Cadmium Orange
- Red Orange
- Ultramarine Blue
- Compose Blue or Colbalt Turquoise Light
- Sap Green
- Forest Green
- Spring Green
- Opera Rose Pink
- Permanent Violet
- Raw Sienna Brown
- Burt Sienna
- Indigo (a blue that can also look grey)
- Black
- Grey
- Gold